This time I will explain the tutorial how to create a business card on the theme of soccer in Adobe Photoshop. In this tutorial I use...
This time I will explain the tutorial how to create a business card on the theme of soccer in Adobe Photoshop. In this tutorial I used Adobe Photoshop CS3 version. Below is the material that will be used in this tutorial :
- Swansea City Away Jersey 2014/15 (I use it because I was a fan of Swansea City AFC)
- Open Sans Font by fontsquirrel
- Swansea City Logo
- Soccer Pitch Wallpaper
1. Creating the Background
Step 1
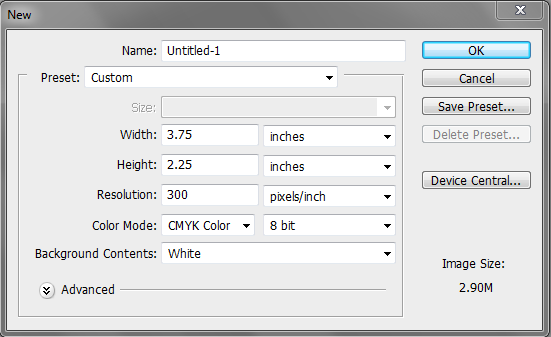
Create a new 3,75 x 2,25 document,with a resolution of 300 pixels / inches and use CMYK color as the Color Mode.
Step 2
Add some guides at all sides of the canvas. To add guides,select View > New Guide. Add the following 4 guides :
| Orientation | Position |
| Vertical | 0.125 in (left guide) |
| Vertical | 3.625 in (right guide) |
| Horizontal | 0.125 in (top guide) |
| Horizontal | 2.125 (bottom guide) |
Step 3
Change the units from pixels to inches whenever you are working with print materials because this absolute unit of measurement is a standard for printers. Change your units of measurement by going to Edit > Preferences > Units > Rulers. Alternatively, you can right-click on your ruler (View > Rulers).
Step 4
Open the Soccer Pitch Wallpaper and copy it to the canvas. Set the size to fit the size of the canvas. Roughly like this :
Step 5
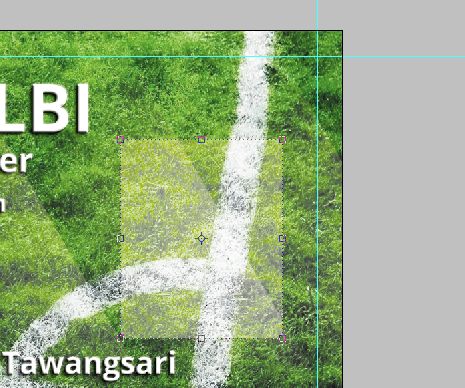
Create a new layer. Set the Foreground color to white (#ffffff) and then pick the Brush Tool (B), setting the brush tip to Soft Mechanical at 300 pixels Master Diameter. Click three times on the canvas to apply your brush stroke, making a big, white circle. Then use the Rectangular Marquee Tool (M) to make a selection as shown below.
Delete the selected area. After it,Click Ctrl + T (Free Transform),and in the Options Bar,set the Angle to -30 and set the size as shown below.
Set the layer type to Soft Light and Opacity to 75 %
Duplicate (Ctrl + J) the diagonal strip 5 times and move the copied layers to the right. Roughly like this :
2. Business Card Typography
Step 6
Set your foreground color to White and use the Type Tool (T) to type your name. I use a free font called Open Sans.
After that,click two times the text layer and add Drop Shadow,Bevel and Emboss,and Contour as shown below.
After that, write a description under the name and repeat the styling actions.
Step 7
We’re finished with the front side. Create a new layer group (Layer > New > Group) and call it "Back". Duplicate some layers from front side to "Back" group.
Place the text for the back side of the business card inside the "Back" layer group. Add some text describing your work, skills, and contact information.
3. Personalize with a Photo
Step 8
Create a rounded rectangle using Shape Tool. Set the layer type to Soft Light and Opacity
100 %. Adjust the size and location like this
Copy the rounded rectangle shape and reduce the size and place it above the previous rounded rectangle.
Step 9
Create a new document with Clipboard preset. Open Swansea City Away Jersey 2014/15 or your jersey and copy it to the new document.
Delete the inside part of your jersey use Quick Selection Tool (W)
Step 10
Put your face into layer. Set the size and position like below. Create the arm with Clone Stamp.
Merge jersey and face. Copy it to your business card document.
Step 11
Open your own background and copy it to your business card document. Place it below the "your photo" layer. Click Ctrl + Left Mouse. After it, click Select > Inverse. Click Delete .
Step 12
Open and copy the Swansea City Logo to your business card document. Set the size and position roughly like below :
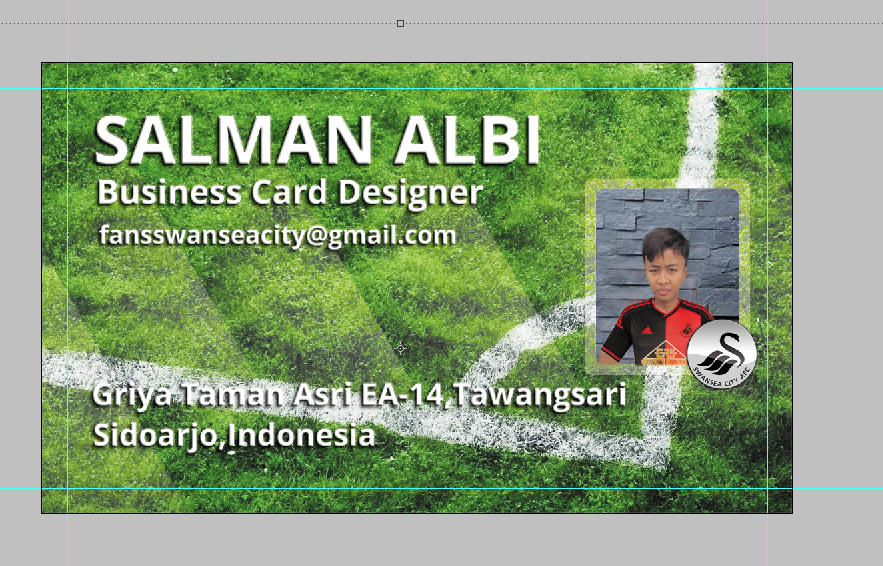
Congratulations !!! We've finished the business card ! Copy "front" and "back" group to the wood background and personalize with your photo like below.


